TEC Science Class to improve refrigeration efficiency: detailed semiconductor refrigeration installation skills and precautions
Welcome to TEC Science Lesson! In this issue, cool will take you to understand and learn the classic installation method of semiconductor refrigeration - screw installation. If you have questions about this article or want to learn more about TEC, please leave a comment in the comments section
01 Semiconductor cooler installation method- Screw mounting
When discussing semiconductor refrigeration, the choice of installation method is very important. It is about the stability and cooling efficiency of TEC systems. Screw mounting is favored in many application scenarios due to its stable structure and easy maintenance. Whether it is high-precision medical equipment, or precision industrial chiller, screw installation can provide a solid and stable support platform. Let's take a look at the specific steps and precautions for screw installation
02 InstallSteps and precautions
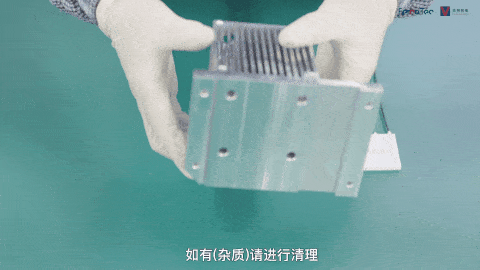
Step 01 Make sure all contact surfaces are smooth and smooth
Carefully inspect the surface of the semiconductor cooling sheet, mounting base and radiator, mainly to see whether there are impurities, burrs and dust residues, and confirm that the surface is clean, so as to ensure that the contact surface is smooth and smooth.
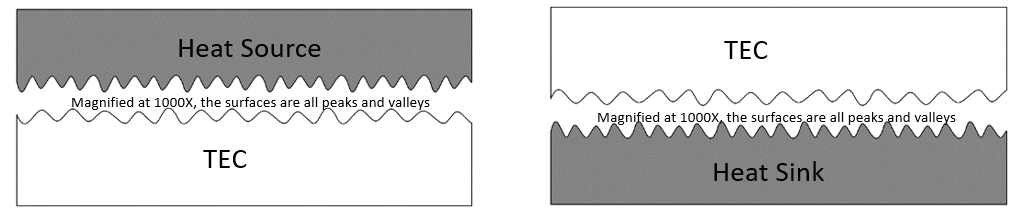
Note: The "smooth and smooth" visible to the naked eye is not really smooth and smooth. The above diagram shows the flatness of two contact surfaces under a microscope. It can be seen that the two flat and smooth planes under the macro will appear multiple "peaks", "valleys" and "hills" after magnification by the microscope. When tightly fitted, only the mountain is in close contact, and the gap at the valley prevents the heat from passing through, resulting in an unsatisfactory heat transfer. Therefore, during the installation process, we need to improve the heat transfer performance of the contact surface: The application of thermal conductive materials can solve this problem.
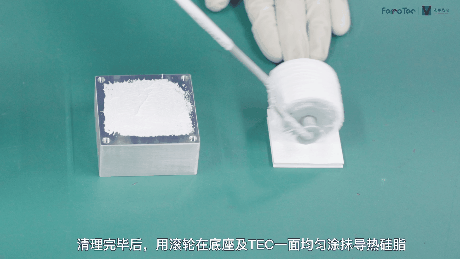
Step 02Coating thermal conductive material
A thin layer of thermal grease (thickness is generally 0.05mm or less) is applied to one side of the base and semiconductor refrigeration sheet to improve the heat transfer performance of the contact surface.

Note: In the assembly process, the heat transfer interface needs to use specific thermal conductivity materials to fill the above valley gap, the purpose is to use high thermal conductivity materials (solder materials, thermal glue, etc., are good choices) to replace the air in the gap, so that the entire contact surface can better complete the heat transfer. As shown in the figure above, the heat transfer is greatly improved after applying the conductive material.
Step 03 Connect the semiconductor cooler to the base
After the base is affixed with a thermal insulation cotton pad, press gently with your fingers to make the semiconductor cooling sheet and the base fit in pairs (pay attention to adjust the TEC to the proper position and press down), and at the same time squeeze out the excess silicone grease.
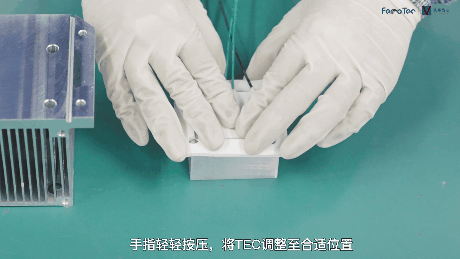
Note: Put the TEC in place and ensure that the applied pressure is balanced. If the TEC is placed out of place or the pressure is unbalanced, it may degrade the device performance and even cause damage to the cooler.
Step 04 Reapply the thermal material
A thin layer of thermal grease (thickness is generally 0.05mm or less) is applied to the other side of the radiator and semiconductor refrigeration sheet to improve the heat transfer performance of the contact surface.
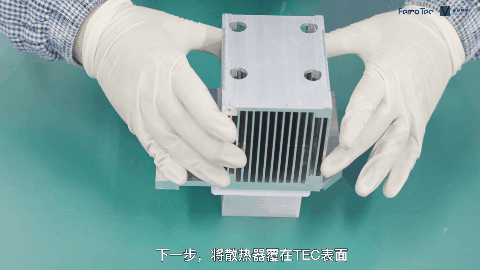
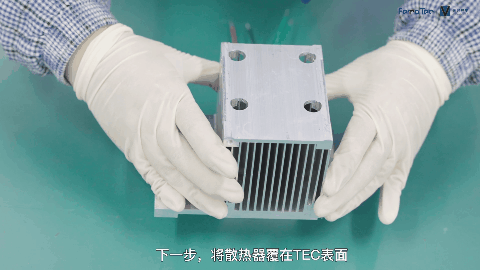
Step 05Connect the semiconductor cooler to the radiator
Cover the radiator on the surface of the semiconductor cooling sheet, and gently press down with both hands to make it fit in pairs (do not skew), while squeezing out excess silicone grease.
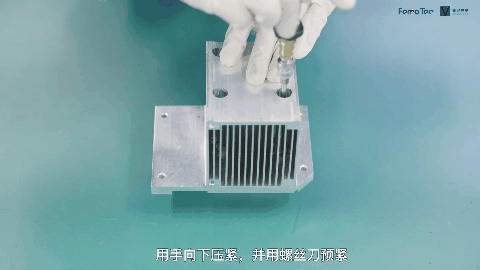
Step 06 Fixed semiconductor cooler and radiator
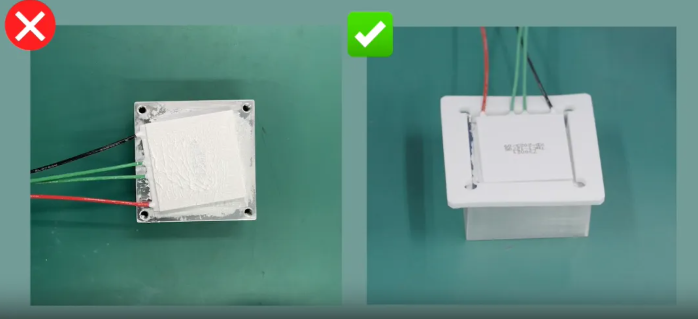
Use screws to secure the semiconductor cooler and radiator together. In order to ensure good parallelism, uniform pressure needs to be applied during installation. It is best to choose a digital display torque wrench and tighten the screws according to the diagonal priority principle. Tighten the screws one by one and tighten them one by one in the same sequence. In this way, a complete semiconductor refrigerator is assembled
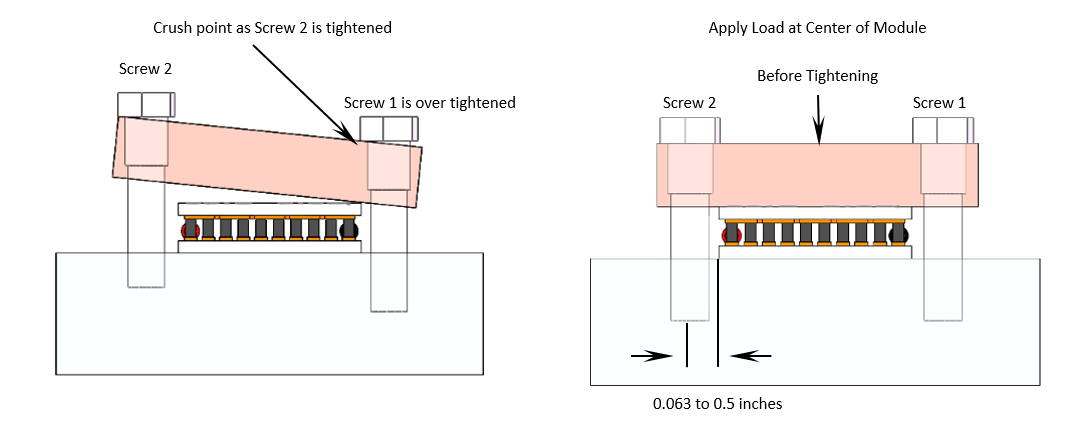
Note: The screw installation position should be equidistant from the TEC edge, and the screw holes should be parallel to each other and perpendicular to the hot and cold side of the TEC. If the screws on one side are too tight, the situation shown on the left will occur: the TEC side will not fit tightly to the heating electronics, or the heat sink will cause it to not operate optimally, or even cause damage to the TEC substrate tiles. In addition, if the clamping screw is too tight, it may cause the heat sink or the surface of the cooled object to warp out of shape. When the component is machined from a very thin material, the deformation and bending will be more obvious, and this deformation will reduce the thermoelectric performance of the device. Therefore, we can effectively reduce such deformation and bending by reducing the screw torque/placing the clamping screw appropriately close to the semiconductor cooler/using a relatively thick material.
Through the study of this lesson, I believe that you have the ability to assemble semiconductor coolers independently. If you encounter any problems during the assembly process, please feel free to leave a message to communicate~